

By DIYLILCNC http://diylilcnc.org Follow
More by the author:
About: Help us produce more tutorials by supporting our kickstarter campaign! http://www.kickstarter.com/projects/chrisreilly/diylilcnc-20-open-source-plans-for-a-low-cost-cnc The DIYLILCNC project is a set of plans… More About DIYLILCNC »
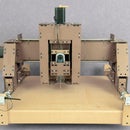
The DIYLILCNC project is a set of plans for an inexpensive, fully functional 3-axis CNC mill that can be built by an individual with basic shop skills and tool access.
CNC devices are used to fabricate physical objects with a high degree of precision. Some CNC devices, including the DIYLILCNC, feature a gantry-mounted cutting tool (like a router) that can move in two or more directions. The operation of the tool is controlled by a computer, which is tasked with translating a digital design into actual tool movement.
The DIYLILCNC can be built for around $700. This cost includes all the stock hardware and sheet material used in construction. CAD files for custom laser-cut parts are distributed along with the plans. Anyone with access to a laser cutter can use these files to fabricate all the panel parts necessary for construction; those without ready laser-cutter access can use local or online laser-cutting services. Some users have even adapted the files to be cut using another CNC mill.
Plans and instructions for building the DIYLILCNC are distributed freely and intended for wide distribution and modification with few restrictions. The plans are formatted to facilitate easy fabrication, especially for beginners. The DIYLILCNC can be built by an individual, a student group, or a class. Besides being immensely fun, building the DIYLILCNC is a great way to learn about motion control and CAD/CAM/CAE.
Specs
-Cutting bed size: ~12” x 14” x 2”
-Spindle speed: 0-35,000 RPM
-Total cost for hardware, sheet material, motors and driver board: ~$700
-Tested cut materials: foam, hardwood, acrylic, MDF, thin copper sheet
Licensing
The plans and source files for this project are released under a Creative Commons Attribution Share-Alike license. This license lets others remix, tweak, and build upon our work and the work of previous authors, even for commercial reasons, as long as they credit all authors/contributors appropriately and license their new creations under identical terms. This license is often compared to open source software licenses. All new works based on the information presented below must carry the same license.
Attribution
Authors’ names and sponsor institutions referenced below must be attributed in any future modification or redistribution of these plans.
This project is a fusion of two instruction sets published by Stuart McFarlane/Oomlout: CNC1/desktop CNC router (2007) provided the basic design for a functioning CNC mill; How to Make Anything (Using Acrylic and Machine Screws) (2009) details a solution for constructing 90° joints in laser-cuts stock using simple hardware.
The plans and source files presented below were adapted and expanded by: Chris Reilly (www.rainbowlazer.com, www.chris-reilly.org) and Taylor Hokanson (www.taylorhokanson.com) with generous support in the form of funding and facilities from the School of the Art Institute of Chicago (SAIC).
Visit http://diylilcnc.org/downloads and get the CAD Files & Assembly Instructions for version 1.0.2.
Use the parts list on pages 19-22 of the instruction PDF to order all the parts, hardware and stock you'll need. The MDF and some hardware can probably be sourced at lower prices from a local hardware store.
The parts costs for these plans include all of the hardware, stock and electrical components needed to build the mill/gantry, driver board and driver board enclosure. The total cost does not take into account the cost of the controller PC, nor does it account for the cost of laser cutting services, should you need to use them. Prices listed were accurate at the time of publication, but may currently be higher (or lower).
In addition to the parts on the list, you’ll have to acquire a PC that can be used to run the controller software (see page 62 of the instruction PDF for specs).
Some parts of the DIYLILCNC must be fabricated by hand. These are mostly done with easy table-saw or chop-saw cuts.
Pages 23-26 of the instruction PDF cover the details.
Use the .dxf file included in the CAD Files & Assembly Instructions for version 1.0.2 to generate your gantry panels from the 1/4" Masonite/MDF stock.
Beware, as not all 1/4" stock is exactly 0.25"-- we found materials to range in thickness anywhere from 0.2"-0.25", and this can make a big difference when trying to fit parts together. Measure stock thickness with calipers before you cut your parts!
Too-thick parts can sometimes be sanded to fit toghether; alternately, you can visit the DIYLILCNC downloads page for an Illustrator symbol file that links all the connection patterns to central symbol shapes--just change the depth of the symbols, and the new thickness settings will cascade out to all the cut patterns in the file.
If you don't have access to a laser cutter, you can use online service bureaus like Ponoko , or look for local providers at a site like ThomasNet . Several cities now have a TechShop , sort of like a Gold's Gym for CNC fabrication. Additionally, many colleges and universities are now acquiring laser cutting equipment, and college students (or professors, for that matter) can easily be paid off in beer and pizza!
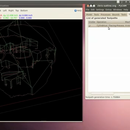
Find a computer with a parallel port, then install EMC Linux. Plug in your configuration settings and you're ready to roll!
Don't have a computer with a parallel port? Here's a detailed walk-through of setting up a $175 PC, including software installation and EMC setup.
For a detailed list of free/cheap design software for CNC milling, see this link. CNC fabrication can be very simple or very complicated depending on what you're doing. Don't be afraid to ask questions at the DIYLILCNC forum, or at local hacker spaces near you.